CLI
The Nuxtus CLI is a command line interface for Nuxt that allows you to manually run some of the commands otherwise run automatically.
Installation
If you installed the Nuxtus Boilerplate then Nuxtus CLI is already installed, you can skip to the next section.
To manually install the Nuxtus CLI run the following in the root of your Nuxt project:
npm i --save-dev @nuxtus/cliConfiguration
In order for Nuxtus CLI to communicate with Directus you need to provide connection credentials. Again, this is done automatically for you if you are using the boilerplate but if not please continue with the instructions below.
Create a .env file in the root of your Nuxt project and add the following lines:
# URL of your Directus instance
DIRECTUS_URL=http://localhost:8055

# Directus login credentials
NUXTUS_DIRECTUS_ADMIN_EMAIL=admin@example.com
NUXTUS_DIRECTUS_ADMIN_PASSWORD=password
Usage
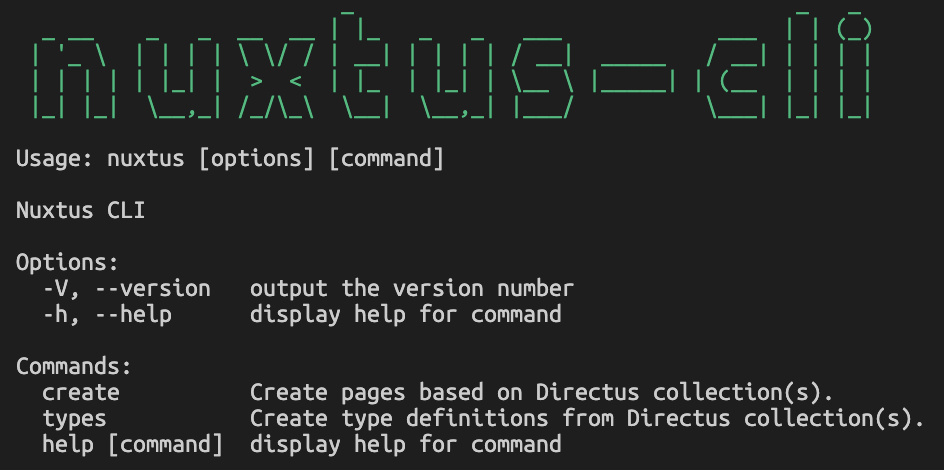
The CLI command comes with in built help commands that can be used to get more information about the commands. From your terminal simply:
nuxtusIf you get a permission denied or command not found message make sure you are in the
/clientfolder and/or use the full path./node_modules/.bin/nuxtus
You should see something similar to:

Make sure Directus is running before you use the Nuxtus CLI.
For more details on a particular command:
nuxtus create -h # For help with the create commandChanging to static token authentication
To change to static token authentication you can run the following command from the /client folder:
nuxtus tokenThis will generate a unique token, save it to the current user in Directus and update your .env file to use this token instead of a user name and password.
Creating pages
The Nuxtus CLI will read all the Collections in your Directus instance and can create Nuxt pages for each.
nuxtus createYou will be presented with a list of all the Directus Collections that have no corresponding Nuxt pages (with the Directus system collections removed). Simply select the Collections you want pages for (using the arrow keys and spacebar) and press enter to create the pages.

For more details on the pages created see using Nuxtus
Updating Types
Nuxtus CLI can also provide Typescript with type information for the collection objects. Simply run the following command to update the type information:
nuxtus typesNuxtus CLI will create an /interfaces folder in your Nuxt project that contains a nuxtus.ts file containing an interface to use for typing.
To make use of the interface file in your Nuxt pages and components:
<script setup lang="ts">
  import { components } from "../../interfaces/nuxtus";
  type CollectionName = components["schemas"]["ItemsCollectionName"];
</script>
Replace CollectionName with the name of your collection.
CLI packaage development
To watch for changes during development:
$ npm start <command>For more details on Nuxtus CLI click here.
Package
To build the JS:
$ npm run buildTesting
Using Vitest.
$ npm run test